

Projects and chats
Start, share and archive projects, edit project context and hold chats with Iris.
A project gathers everything about one piece of research: studies with their reports, presentations, files and questions. In it you hold as many chats with Iris as you like. Whatever a chat creates lies in the project. Your chats are private, even in a shared project.
Starting a project
A project starts with a message. On the home page, next to the audience picker, sits the Project picker, preset to New project. If you send like this, the app creates a new project with your first chat and names both after your message. If you pick one of your projects there, the new chat starts in that project. New project on the Projects tab leads to the same input field. There is no empty project without a chat.
The Projects tab
The Projects tab on the home page shows every project as a card: drawn sheets of its charts, presentations and images on top, below them Project, the name, a short summary and the members. Iris writes the summary from the project's contents, never from a chat. If a project has no contents yet, the sheet shows the number of your chats.
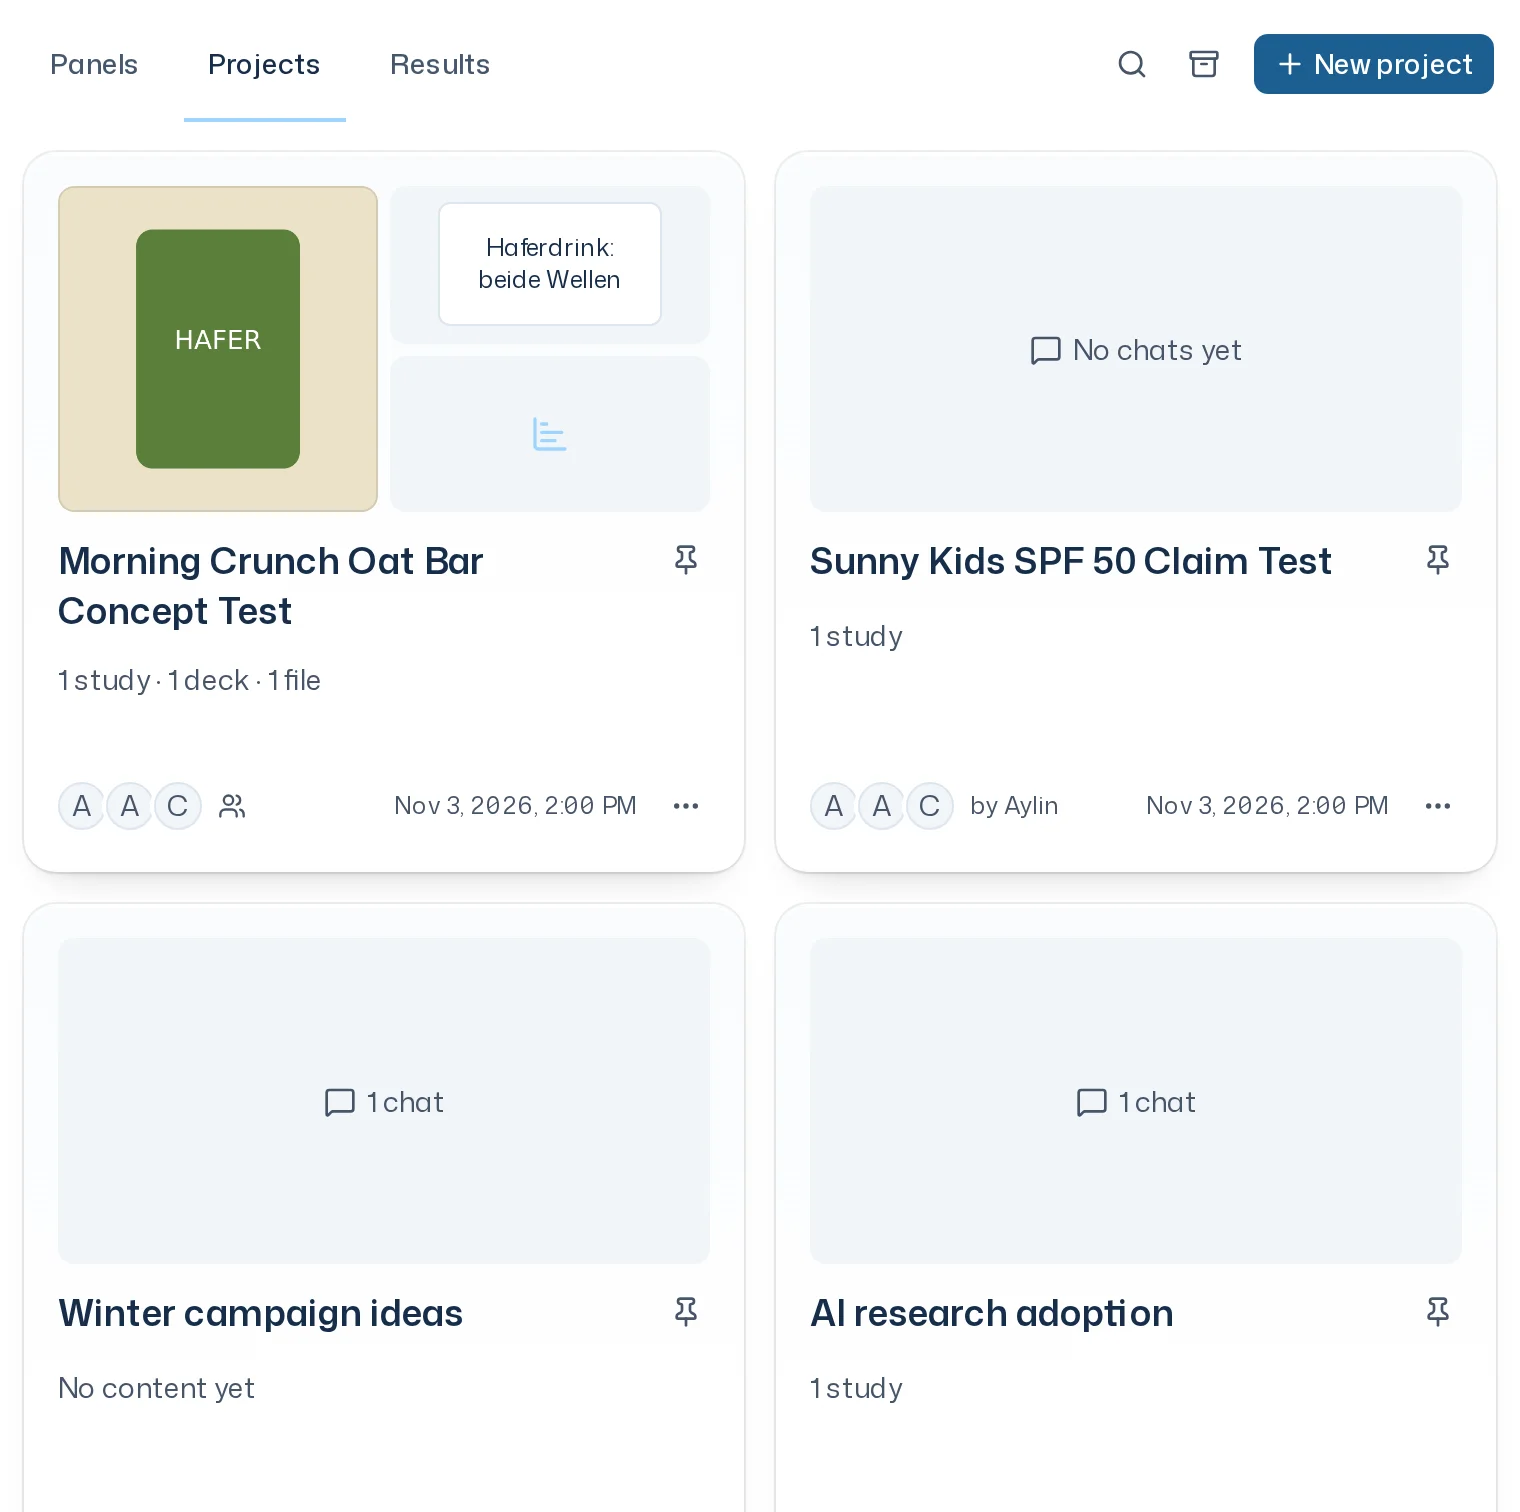
Switching between Panels, Projects and Results keeps your scroll position, including while the next tab loads. The logo in the header takes you to the top of the home page.
- Pinned projects come first, the rest by last activity.
- A project someone else shares with you says by and their name. Your own shared project shows a Shared icon.
- The magnifier searches projects by name (Search projects).
- Show more adds the next projects below; your place in the list stays.
- The archive icon shows your archived projects.
The project page
Click a project card to open its project profile.
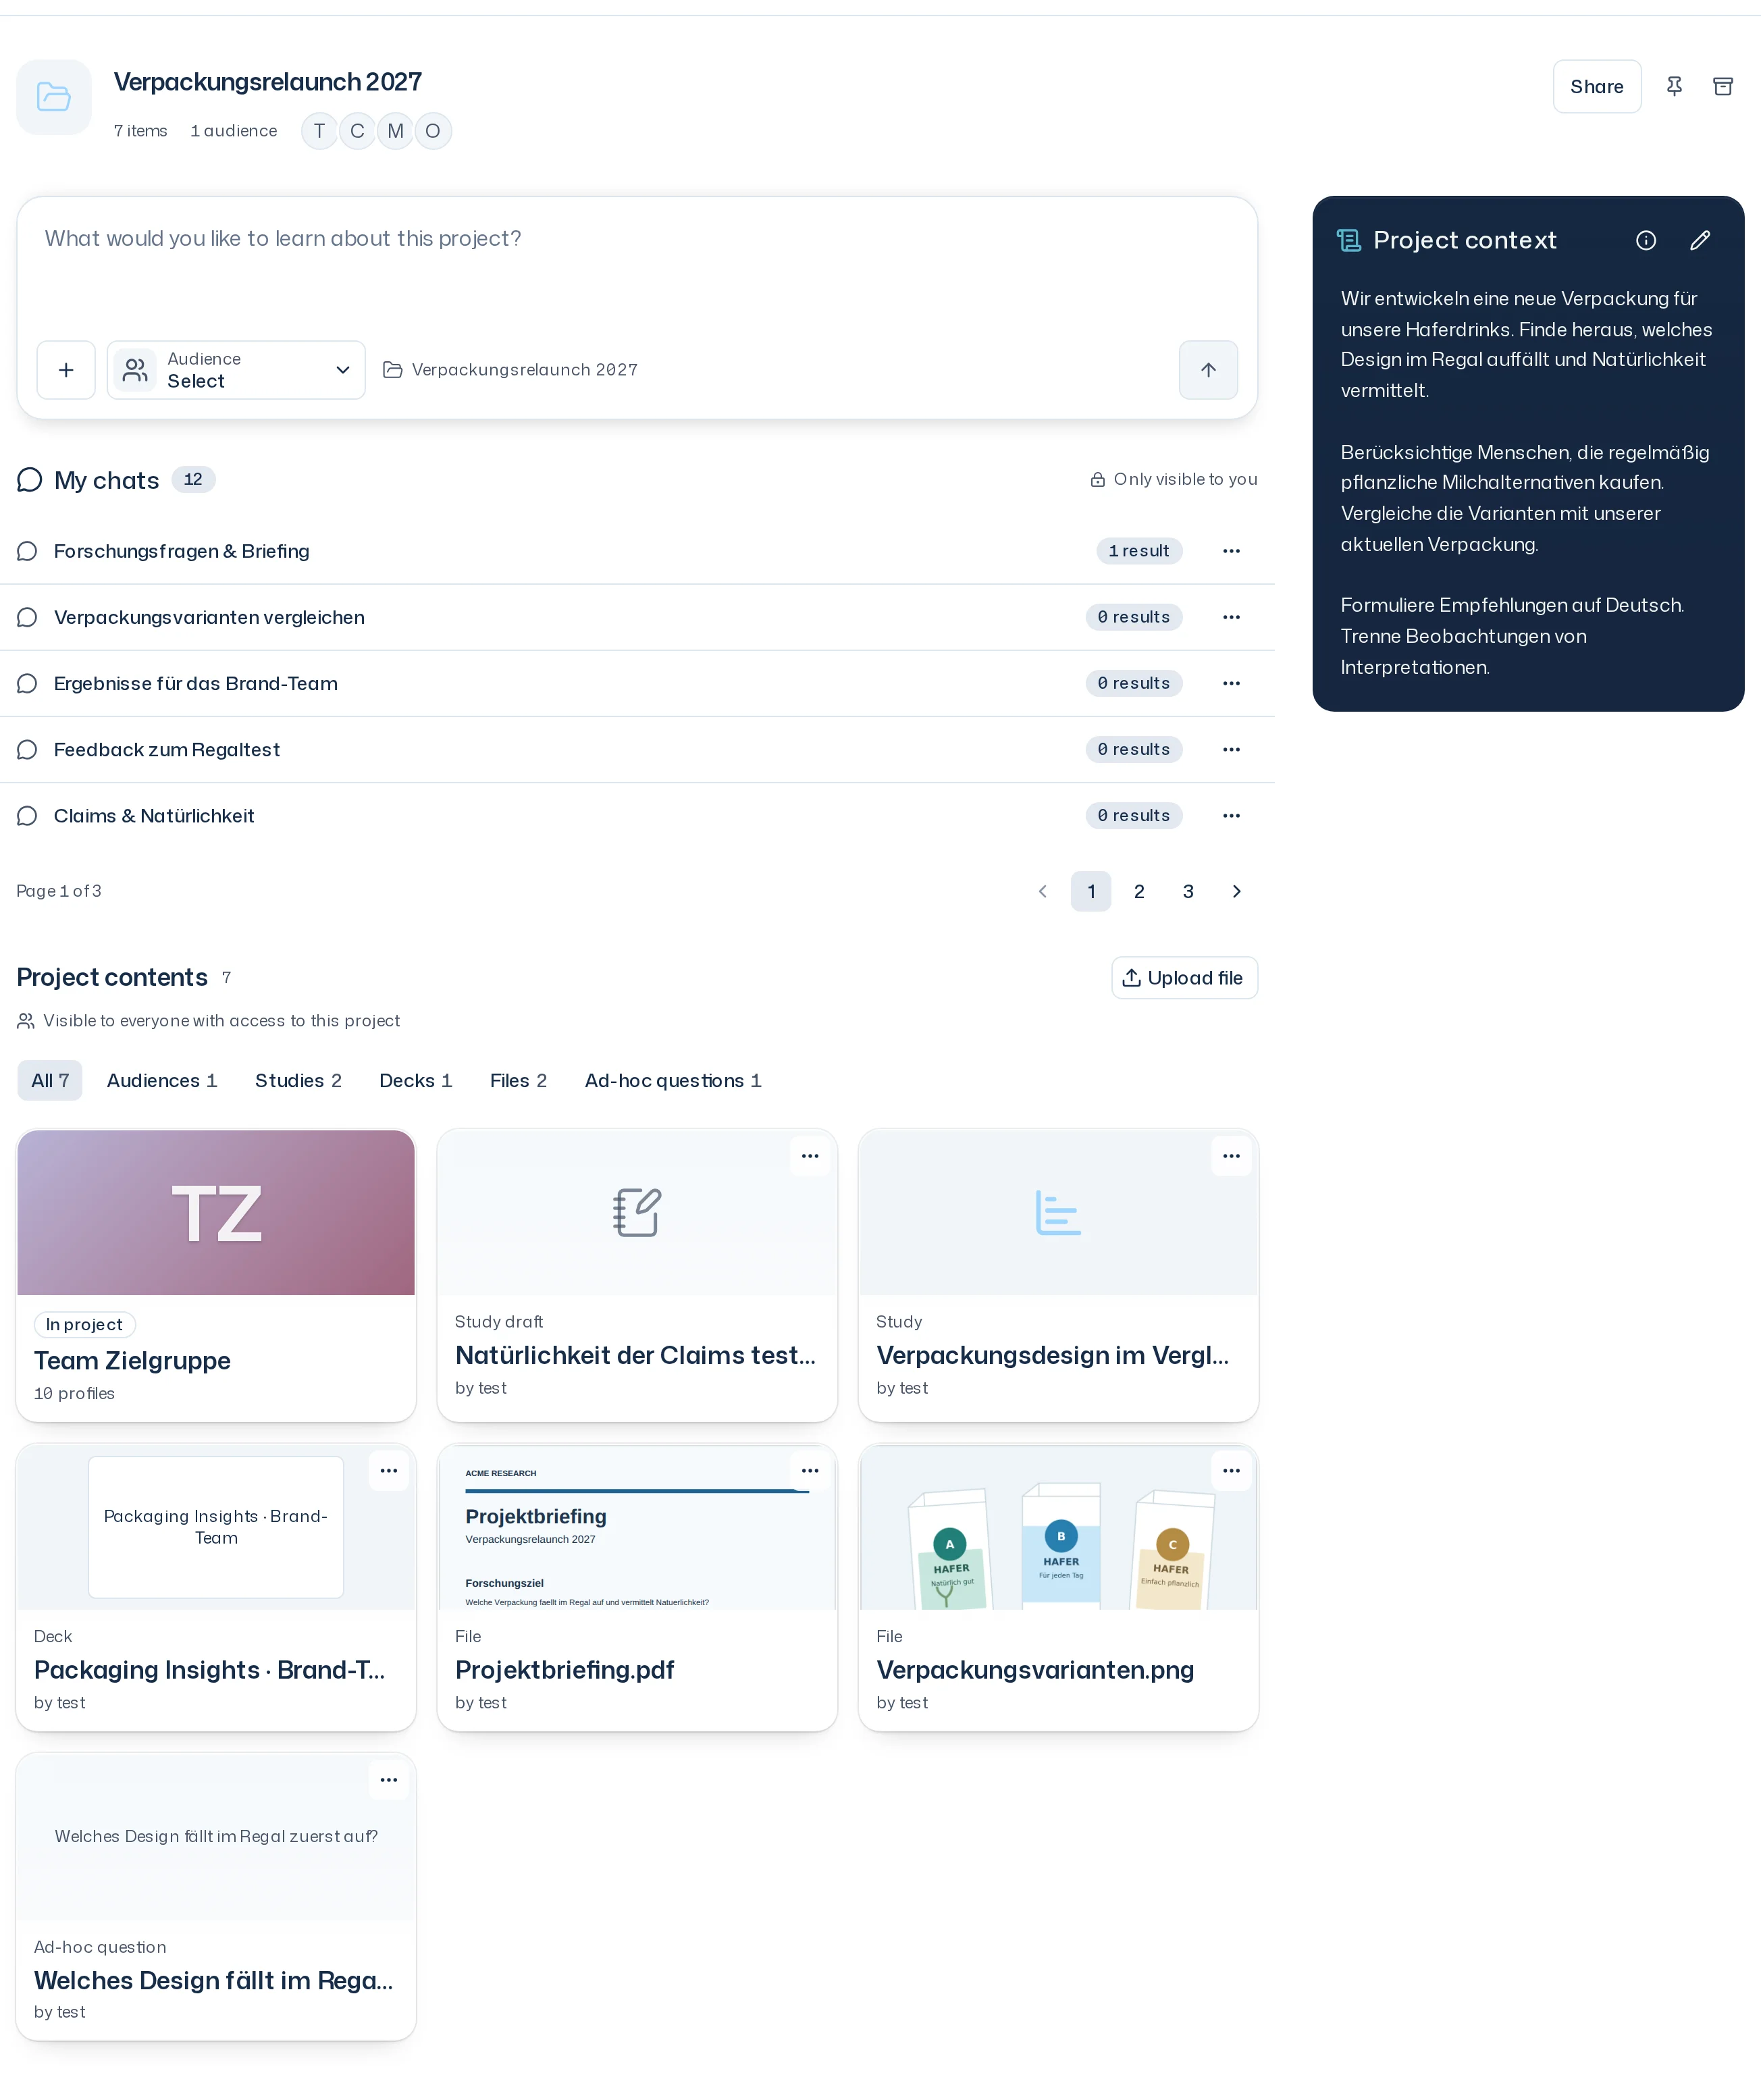
- Header: the project name, which every member can edit, content and audience counts, members, Share, Pin and Archive.
- Composer: start a chat in the current project. Use + to upload files or choose existing content from the library. Choose an audience beside it; the fixed project sits on its right.
- My chats: your private chats in this project, five per page. Use the page switcher to see the next entries.
- Project context: shared goals and guidance for Iris, in the blue card on the right.
- Project contents: preview cards for shared audiences, studies and drafts, Presentations, files and questions. Each card names its kind in colour above its name, such as Study or Panel. Type filters narrow the list. Everyone with access to the project can see these contents. Use Upload file to add a file directly to the project.
Click a content card to open its details: reports and question results, audience criteria and profiles, Presentations, drafts, and image or PDF previews. Go to chat opens your latest conversation that used that content. If you have no linked conversation, the button stays disabled. Mark for presentation, Share and Export are on the study's or question's own page, not in this dialog.
Every member edits everything in the project. The creator of an item and the project owner can delete it. The Delete “…”? dialog asks first. If an item is still in use, it stays: That is still in use and stays.
Project context
Project context applies in every chat in the project. The info icon explains how Iris uses it. Click the pencil, edit the text and select Save. Cancel discards the changes. Long text scrolls inside the card.
Iris reads the context in every project chat, and each analysis keeps the text that applied when it started. Read more under Project context.
Sharing
A project is always shared as a whole: with nobody, with chosen members of the team or with the whole team. Only the owner shares and removes members.
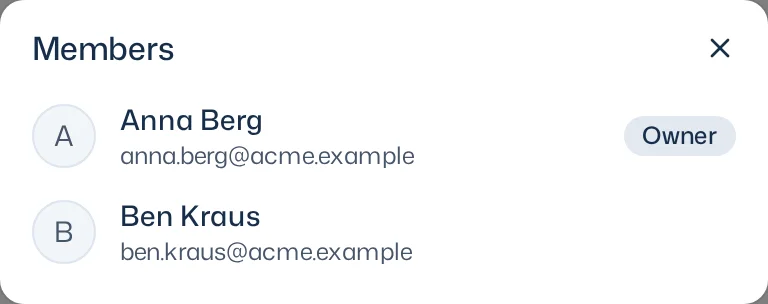
Click the profile pictures in the header to open Members, showing names, email addresses and the owner label. In Members and Share, long names and email addresses are shortened when needed; roles and controls stay visible.
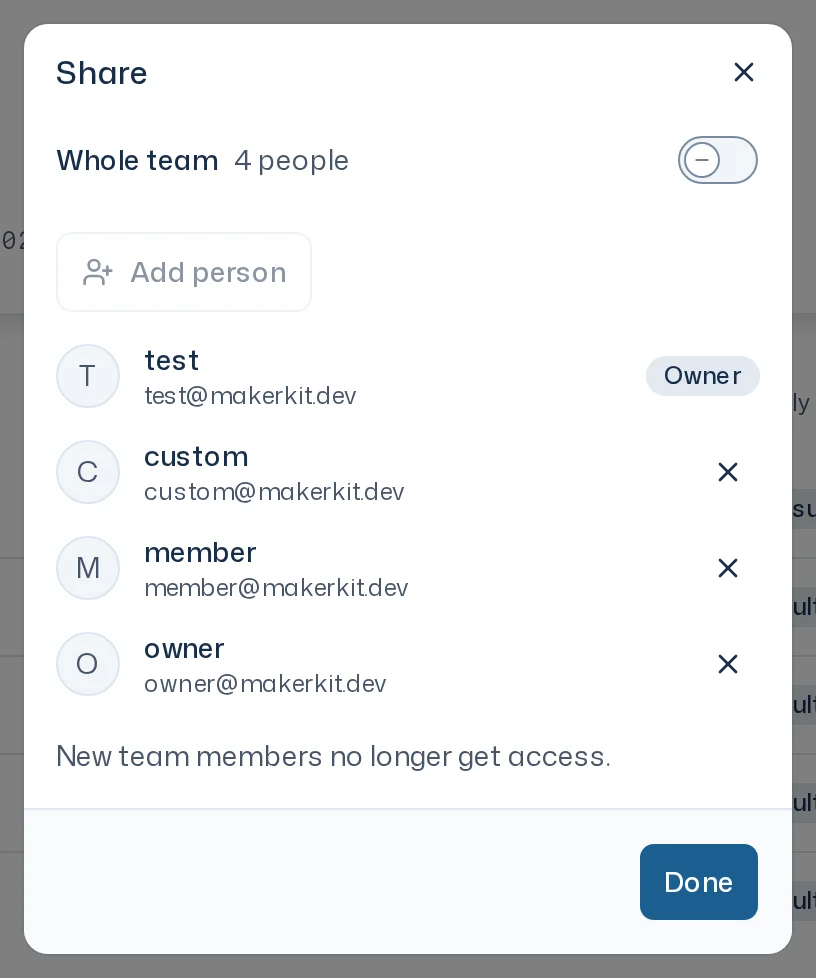
- On the project page, click Share.
- Switch on Whole team, or add single members through Add person. Remove … takes someone out again.
- Before you confirm, the dialog shows the consequences, such as Bell and email: … for everyone who gains access and Lose access, their chats rest: … for everyone who loses it. Confirm with Done.
- With Whole team, members who join the team later also see the project. Switching it off shows New team members no longer get access.
- Everyone who gains access gets the notification Project shared, in the bell and by email.
- Whoever sees the project sees and edits everything in it, launches survey runs on the team's credits and builds presentations. Nobody sees the others' chats.
- If someone is removed, what they created stays in the project. Their chats in it rest and come back if they are added again.
- Team owners can't see an unshared project.
To show someone a single presentation, study or file, it belongs in a project shared with that person. You don't share single objects.
Pin and archive
Pin keeps a project at the top of your list, Archive moves it out of your list without deleting anything. Both apply only to you: other members keep the project in their list. You find archived projects through the archive icon on the Projects tab; Restore brings one back. You can't leave a project; archiving is enough.
Chats
On the project page, My chats lists your chats in this project. Each entry shows completed study or question results and Presentations created or returned as results in that conversation. Repeated uses count once; files, audiences, drafts and simple mentions do not count as results. A new chat is first named after the beginning of your first message; after the first answer, Iris gives it a short, more fitting name. The … menu on a chat offers:
- Rename: enter a new Chat name.
- Delete: removes the chat after asking Delete chat?. What the chat created stays in the project. If a study is starting from this chat right now, wait a moment and try again.
Use Current project on the home page to open your most recently active project and find My chats there. Search with ⌘K also finds your chats and names each chat's project.
At the top of a chat, click the chat name to open search. The logo on the left takes you to the home page. Your profile picture on the right opens the account menu.

In a chat, Iris knows everything in the project, including its audiences, but never another chat. Name an audience and Iris takes exactly that one from the project. She creates, changes and starts only what lies in this chat's project. She can read and cite everything you can see. To repeat a study from another project, Iris copies its design into this project; the study stays in its project.
Research in a chat
On wide screens, the Research overview stays visible on the right. Its header names the project and opens the project page. The project's audiences come first, then one card per study (including drafts), question and Presentation, and finally the Files. The cards are built alike; Run a study explains what they show. Stimuli stay with their study.
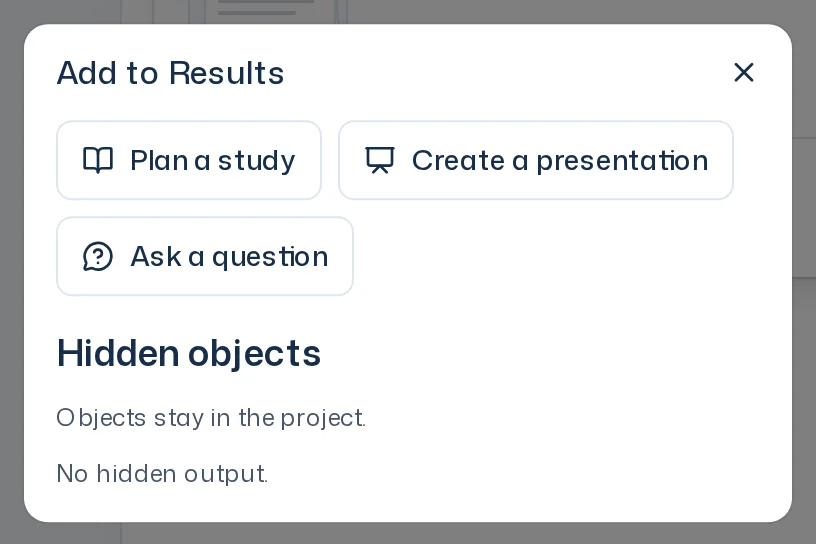
+ in the header and + beside Files open the picker. + Audience adds an audience from the picker to the project, or Describe a new audience prepares a message to Iris. Ask a question, Plan a study and Create a presentation prepare an editable message to Iris. Existing text and files stay in place; work starts only when you send. Upload file opens the composer’s file chooser. A study can be prepared before choosing its audience.
The audiences at the top are those the project's survey runs, preparations or questions use, and those a member added or brought into one of the project's chats, the same for every member. You bring an audience into a chat by mentioning it in a message, choosing it when Iris asks, or having Iris create it; a created audience appears once it is ready.
Remove from project in a card's ⋯ menu asks in a dialog before Remove hides the item. Confirm to hide it, or choose Cancel to keep it. The picker also lists Hidden objects. Add brings one back. Dock visibility applies to the project. An audience is hidden with its × and comes back like other items or through + Audience. Content, running work and sources stay available. Undo brings the item back immediately; later, use the picker. The setting stays saved after reloading.
Opening an item replaces the overview with its full Dock detail. The compact location path in the Dock header names the study and survey run, not the project. Back always returns to the project's Research overview. Saving or discarding unfinished edits follows the same checks as switching views. A study opens its survey runs and preparations; its report stays bound to its exact run.
No longer available means a saved target was deleted or you no longer have access. A loading error lets you try reading the content again.
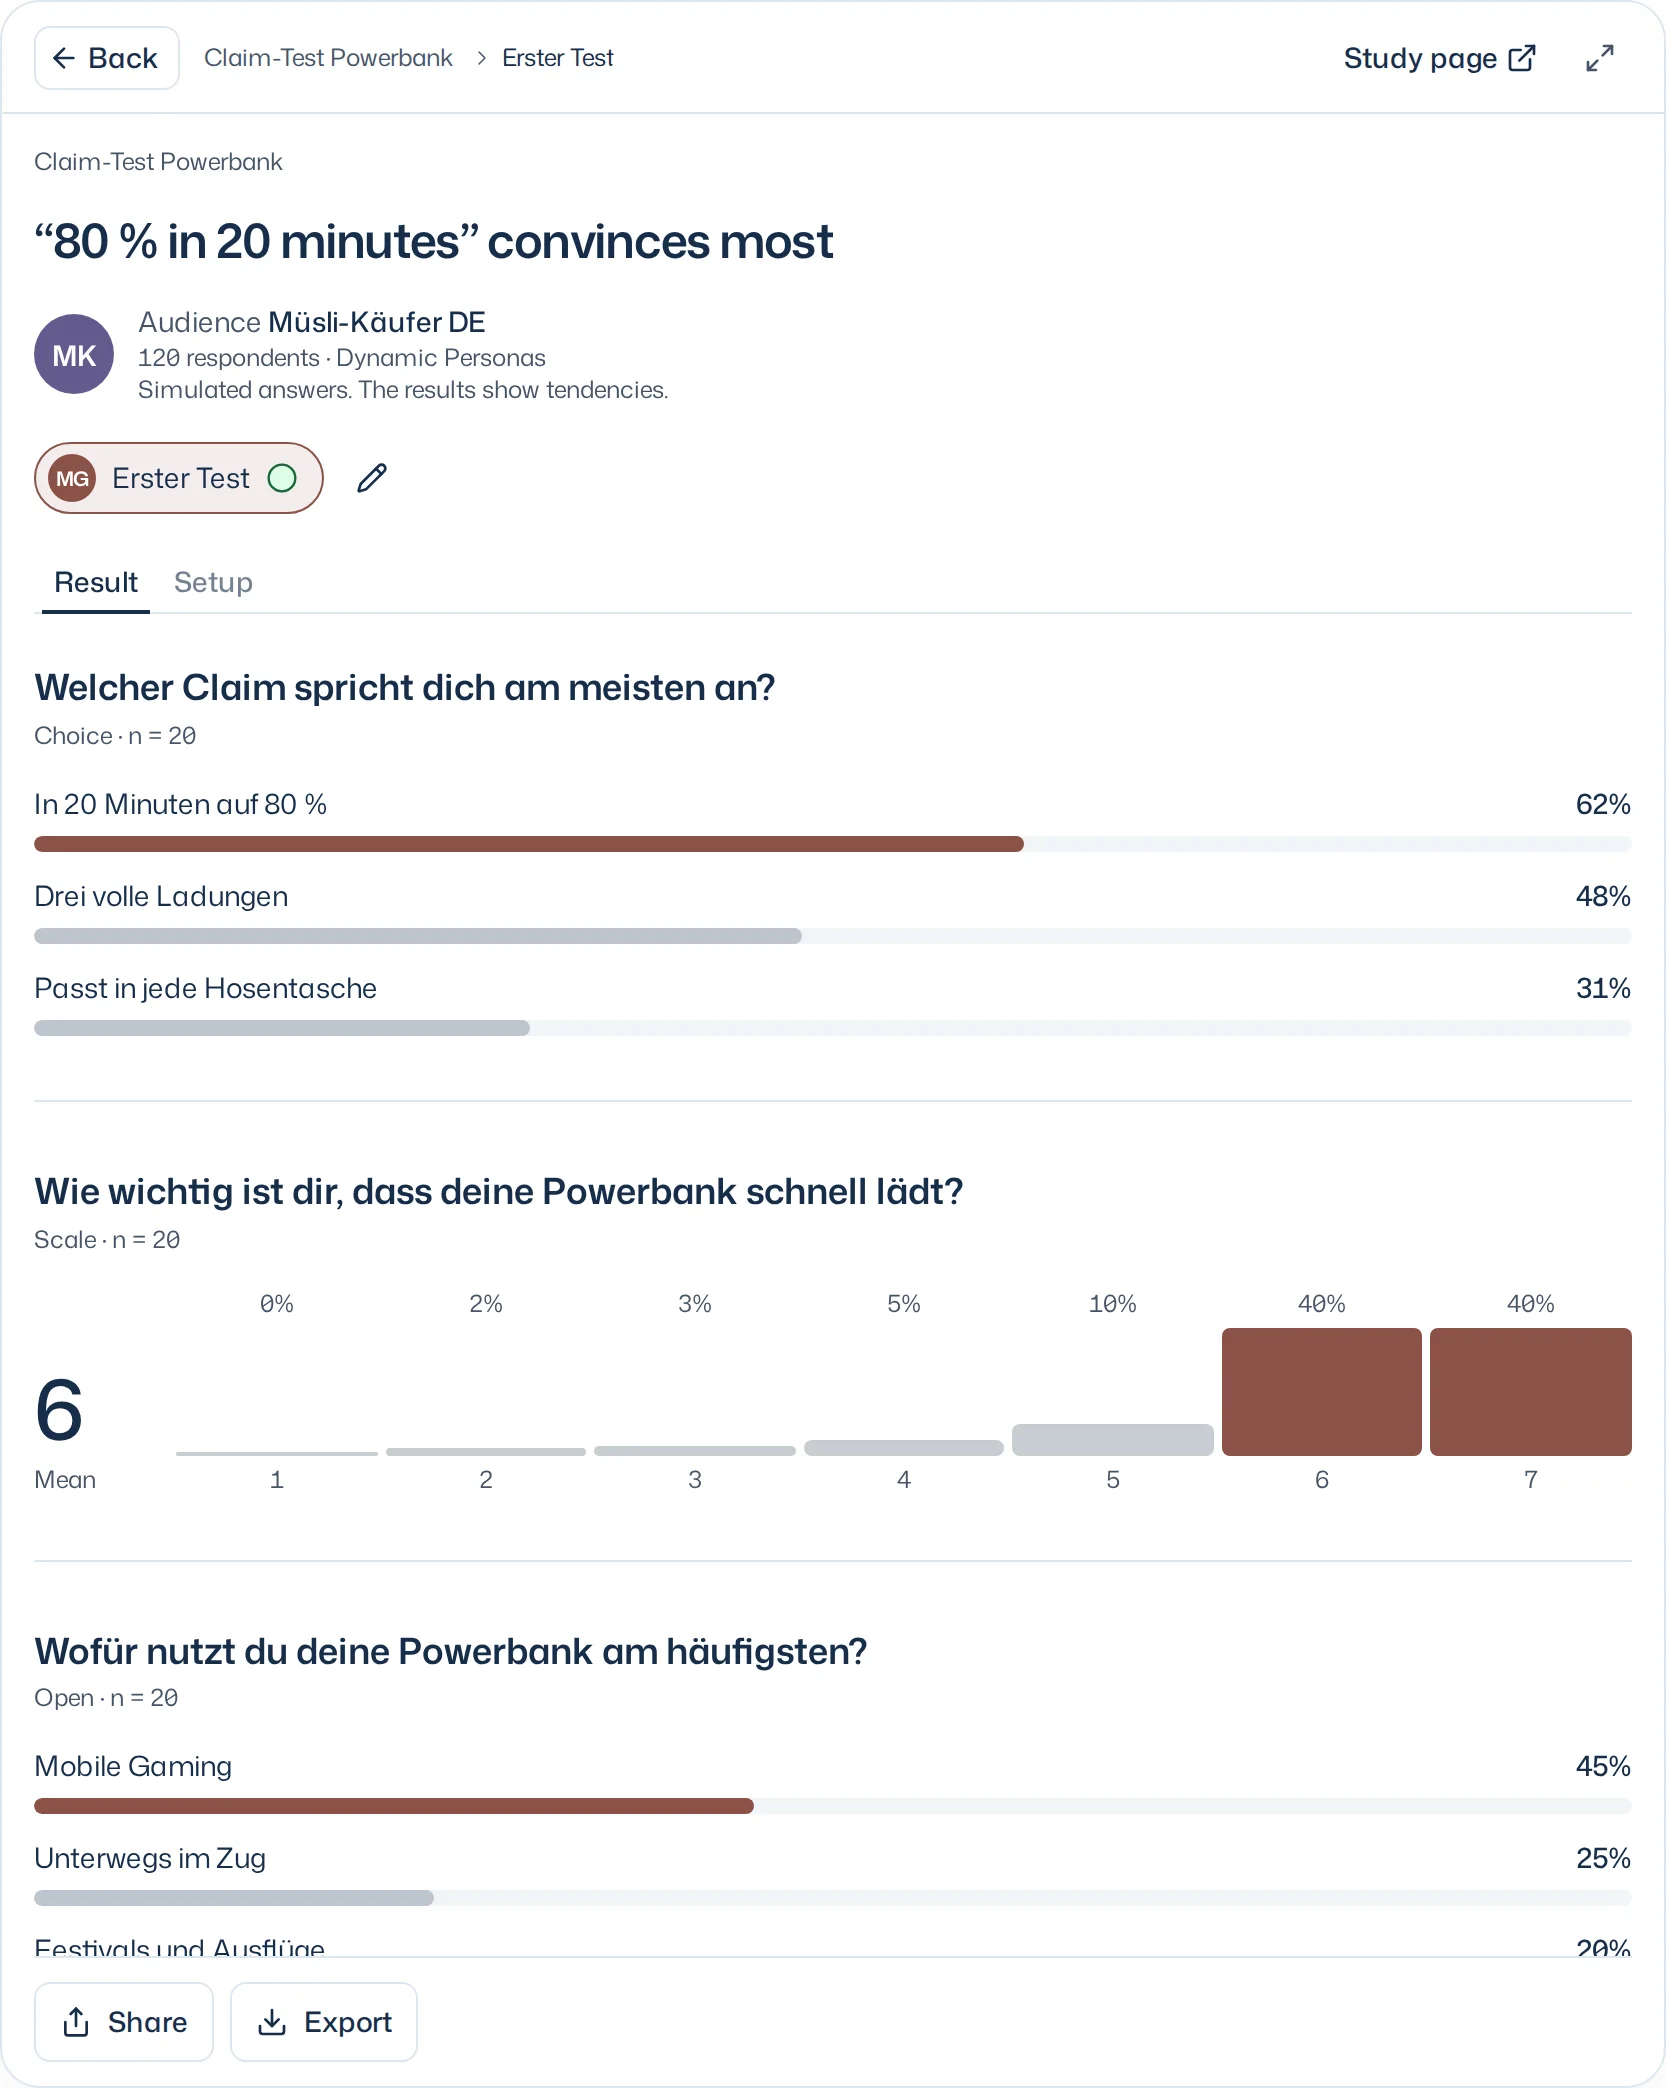
The toolbar with Back and the location path stays visible while you scroll. Hover over Back or focus the button to read the project name. For a study, Study page opens the same study at full width. Below the toolbar are the survey run, study name and status, followed by the view buttons of a launched run.
Long labels stay on one line and end with … when space is limited. Hover over a label or focus it with the keyboard to read its full text.
Research updates on its own, including when someone in the project adds a survey run or source to a study. Open presentations, reports and report cards in the conversation also show changes automatically. After an Iris turn, actions that need its changes wait for the updated state. Your open view, focus and unsaved input stay as they are. A focused card keeps its place until you leave the cards. After a lost connection, Research catches up without duplicate cards. If the automatic check fails, Research retries once after 15 seconds in a visible tab, then waits for the next regular check. If loading fails, the last loaded state stays visible and you can load it again.
When you return after switching tabs, an open report, file or panel also catches up with changes made while you were away. If the view is still loading an older state, it updates again automatically once that read finishes.
New and Updated show what changed since your visit began: a card that joined, or a newly used version or survey run. The marks stay while you remain in the chat, including when you open cards, reload or switch browser tabs. Coming back from another chat or area starts a new visit: old marks go away and changes made while you were away are marked. Each browser tab keeps its own marks. What happens when a result arrives is described in Run a study.
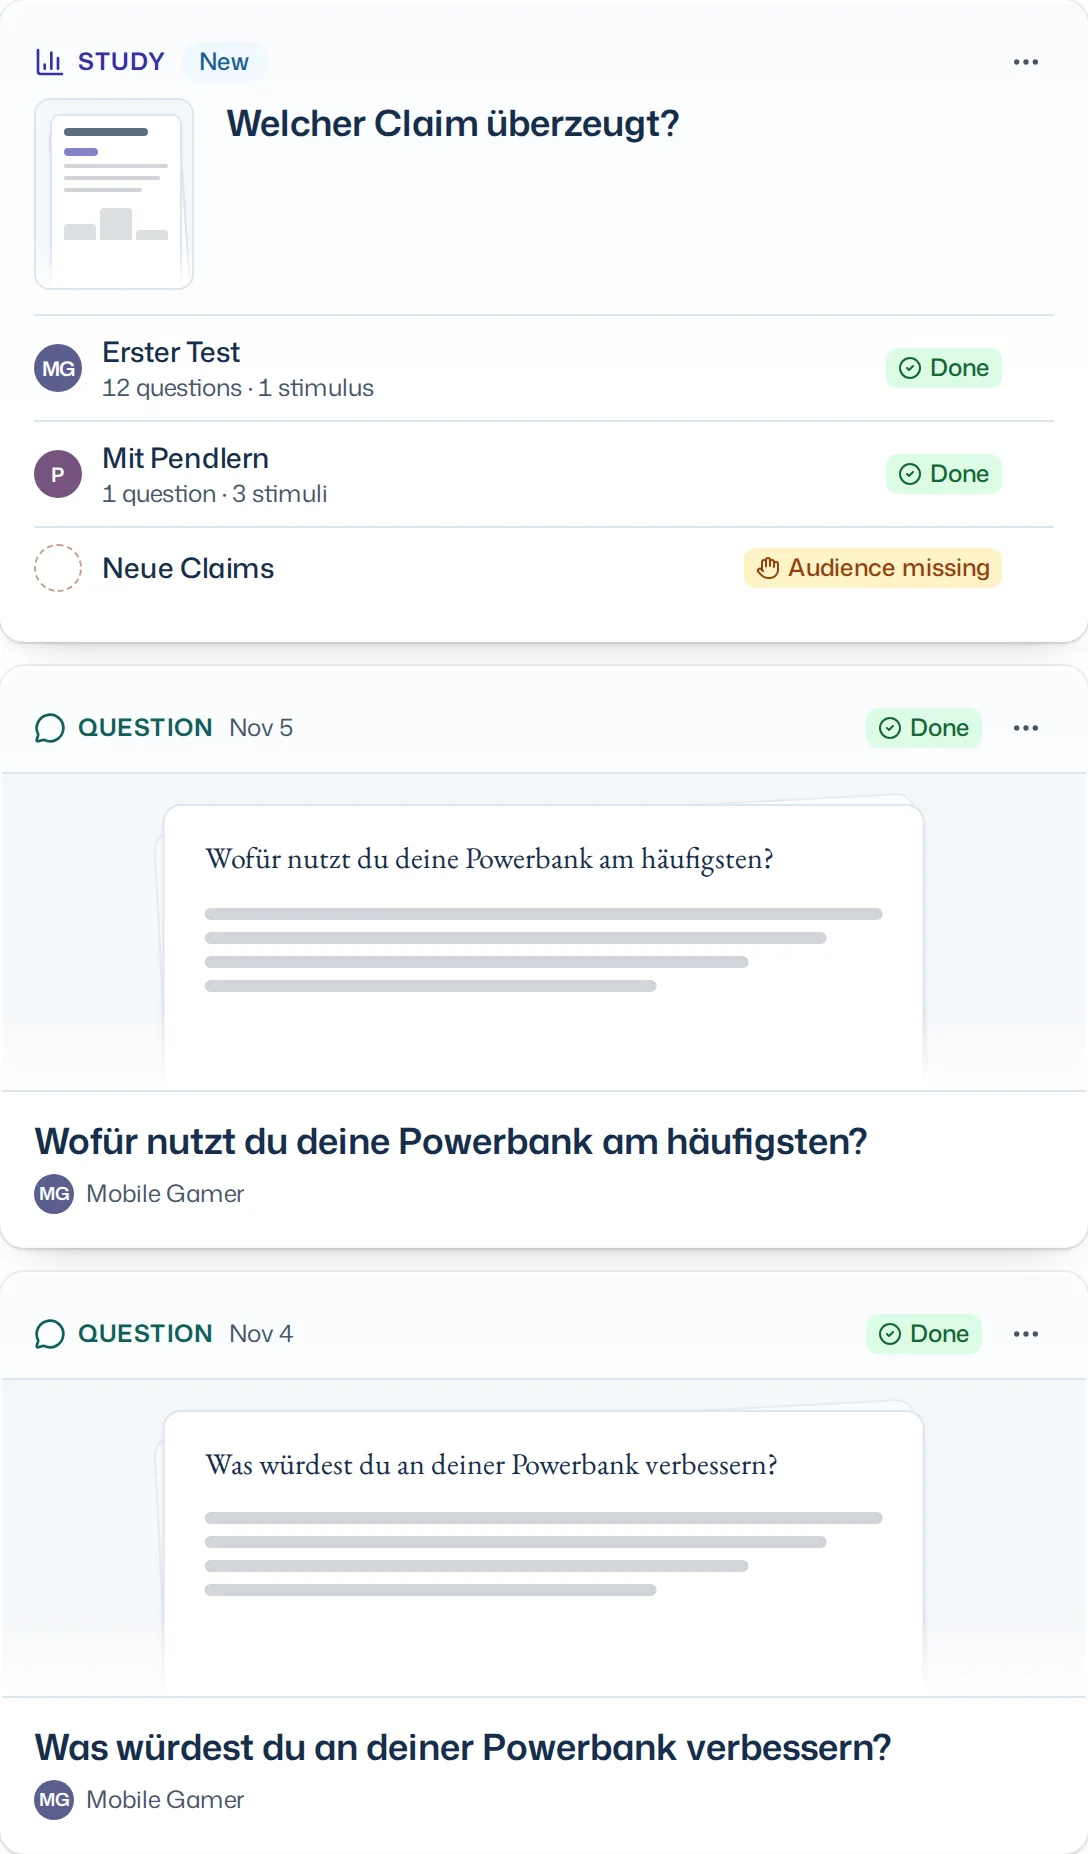
Reloading or reopening a chat restores your last saved view, including the selected version, area, page or Presentation slide and filters. Research stays visible on wide screens even if an older Dock was closed. Access is checked again when the view opens. If another tab or device saved a newer view, Load saved view adopts it; the older tab cannot overwrite it silently.
Changing your account, team or MFA status reloads your saved view. Pending view changes from the previous session do not carry over; new changes can be saved in the current session.
Drag the separator beside the conversation, or focus it and use the arrow keys, to adjust the width of Research. The width applies to the overview and every detail and stays on this device. On narrow screens, Research fills the screen. Return to conversation closes the view; the Research icon reopens it. Changing screen size keeps the same workspace, unfinished edits, version, page and slide. Focus stays in a field that remains visible.
Until the project has its first result, Output offers Ask a question, Plan a study and Create a presentation, even when audiences or files are already there. Each row prepares a message to Iris and sends nothing. + opens the same picker as in a populated project.
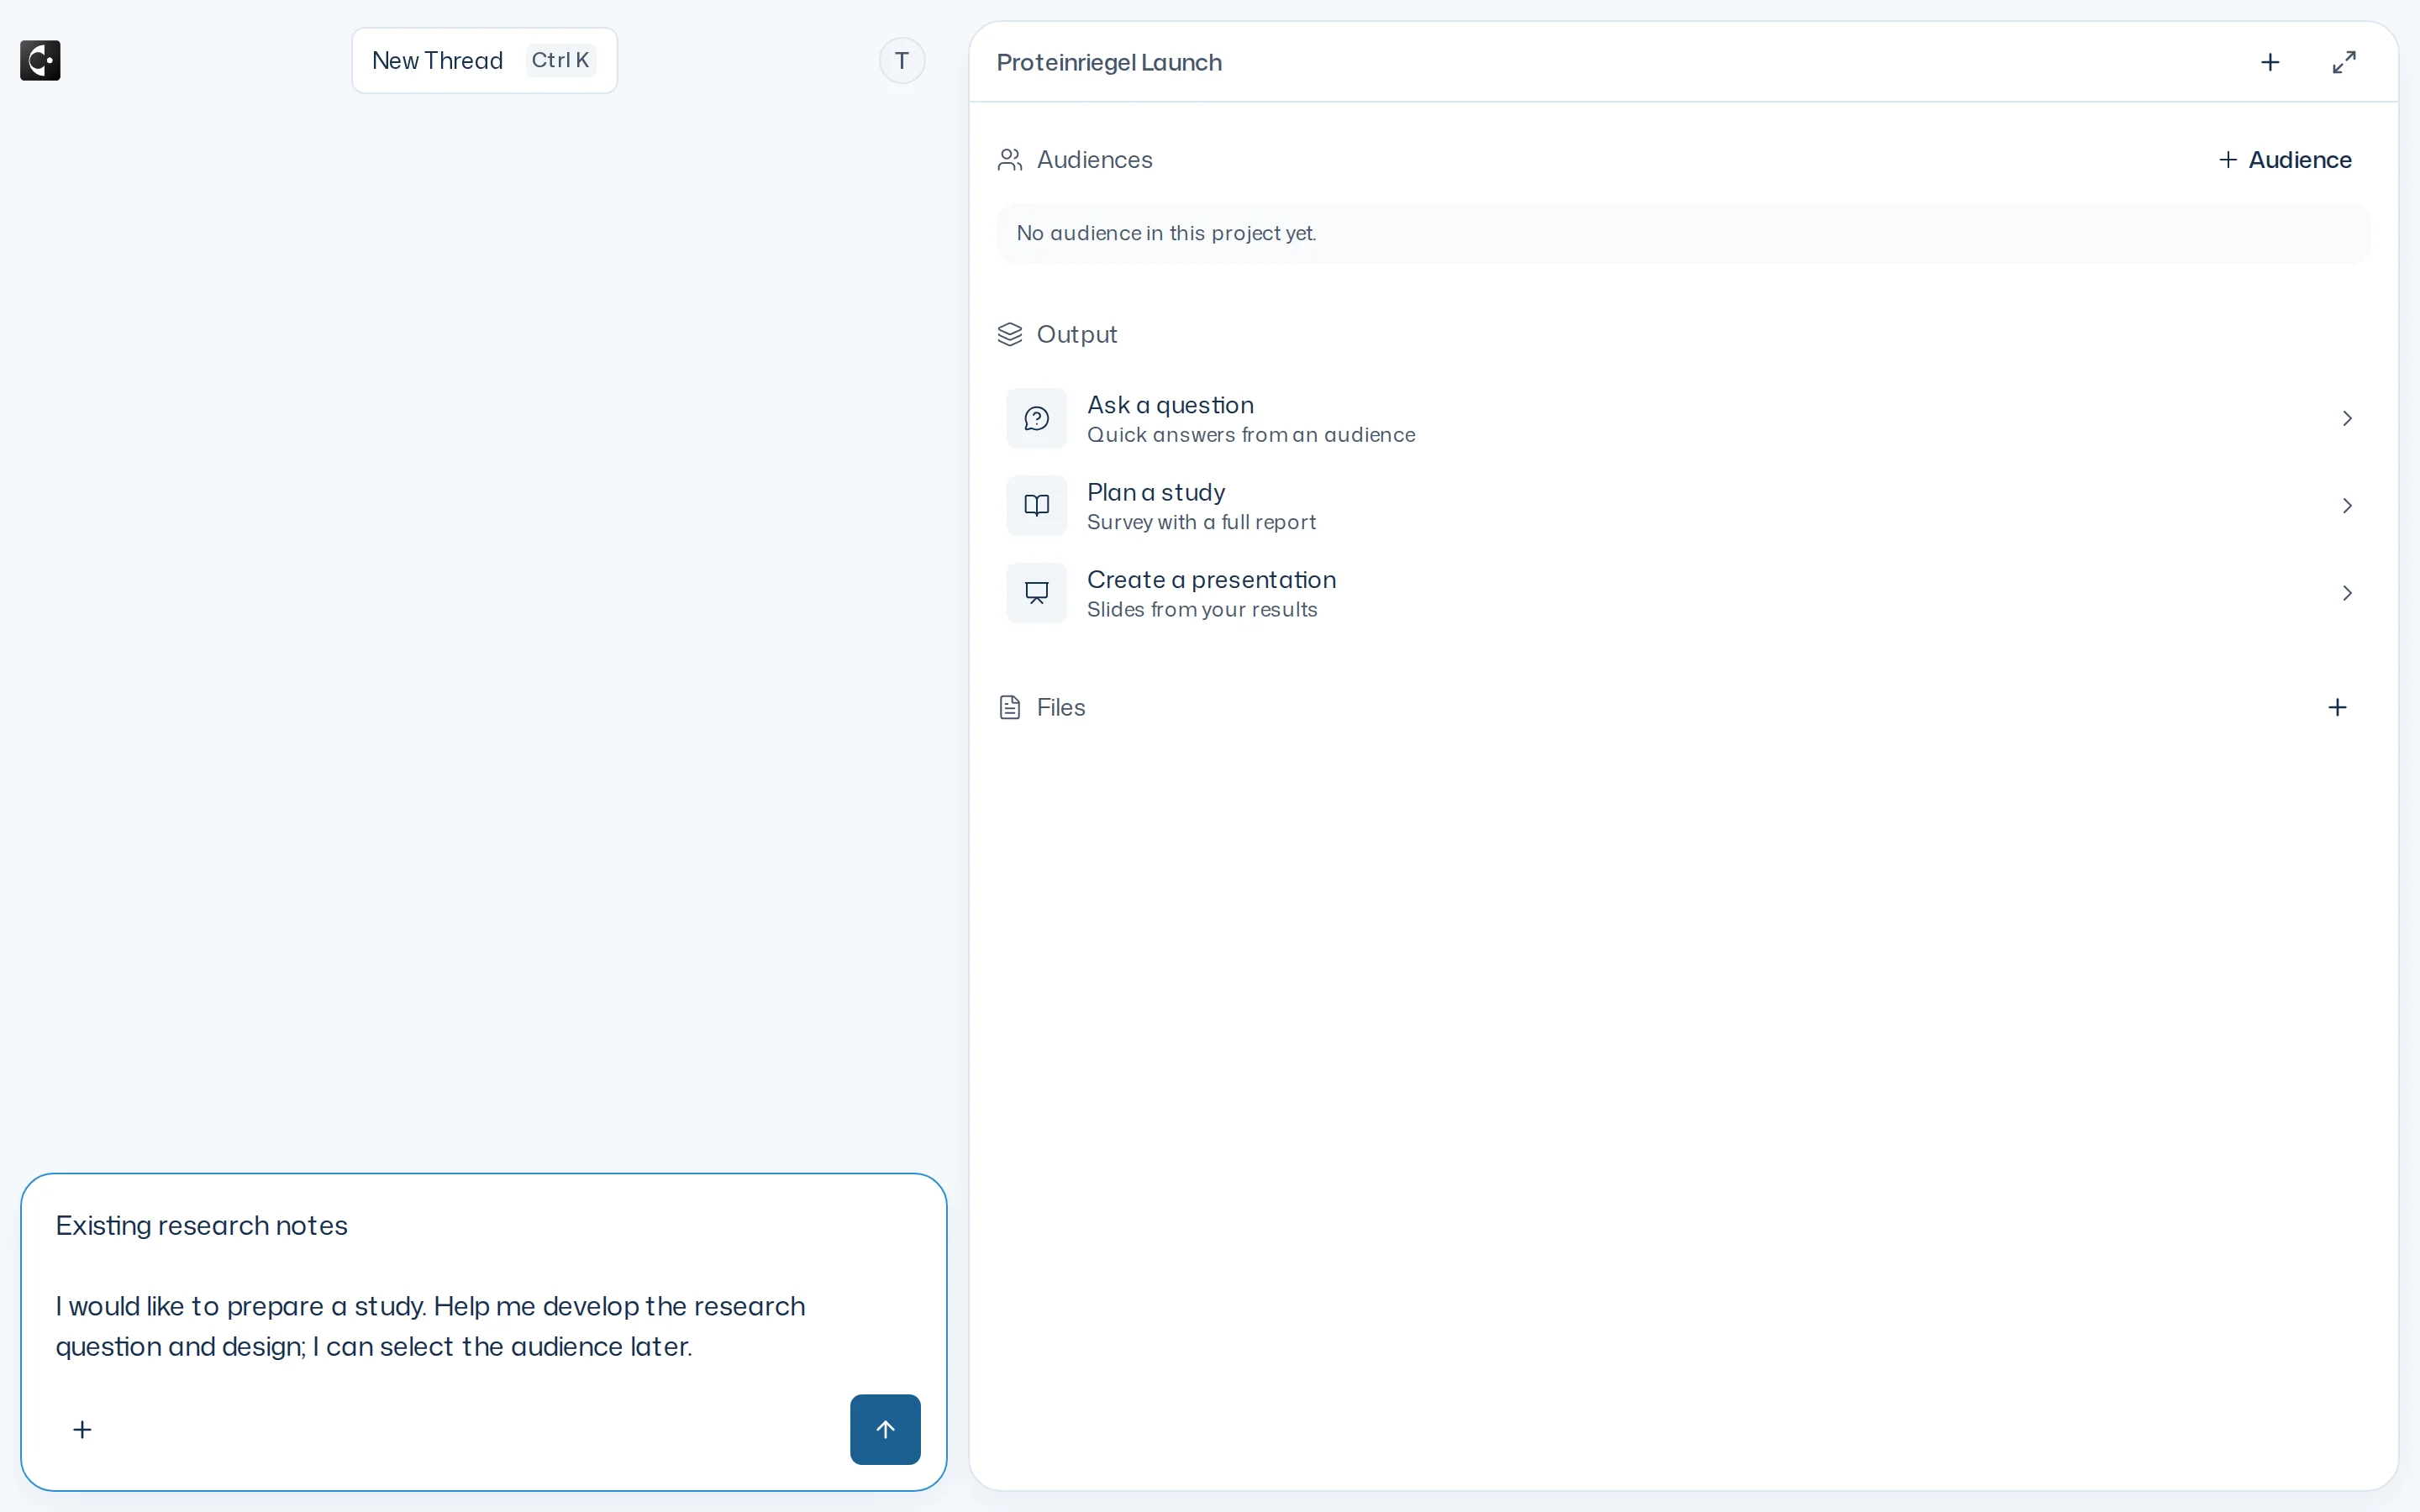
Under Files, Upload file adds the matching request and opens the input field's file chooser, like + > Upload file. Upload starts only after you select a file. On narrow screens, you return to the conversation.
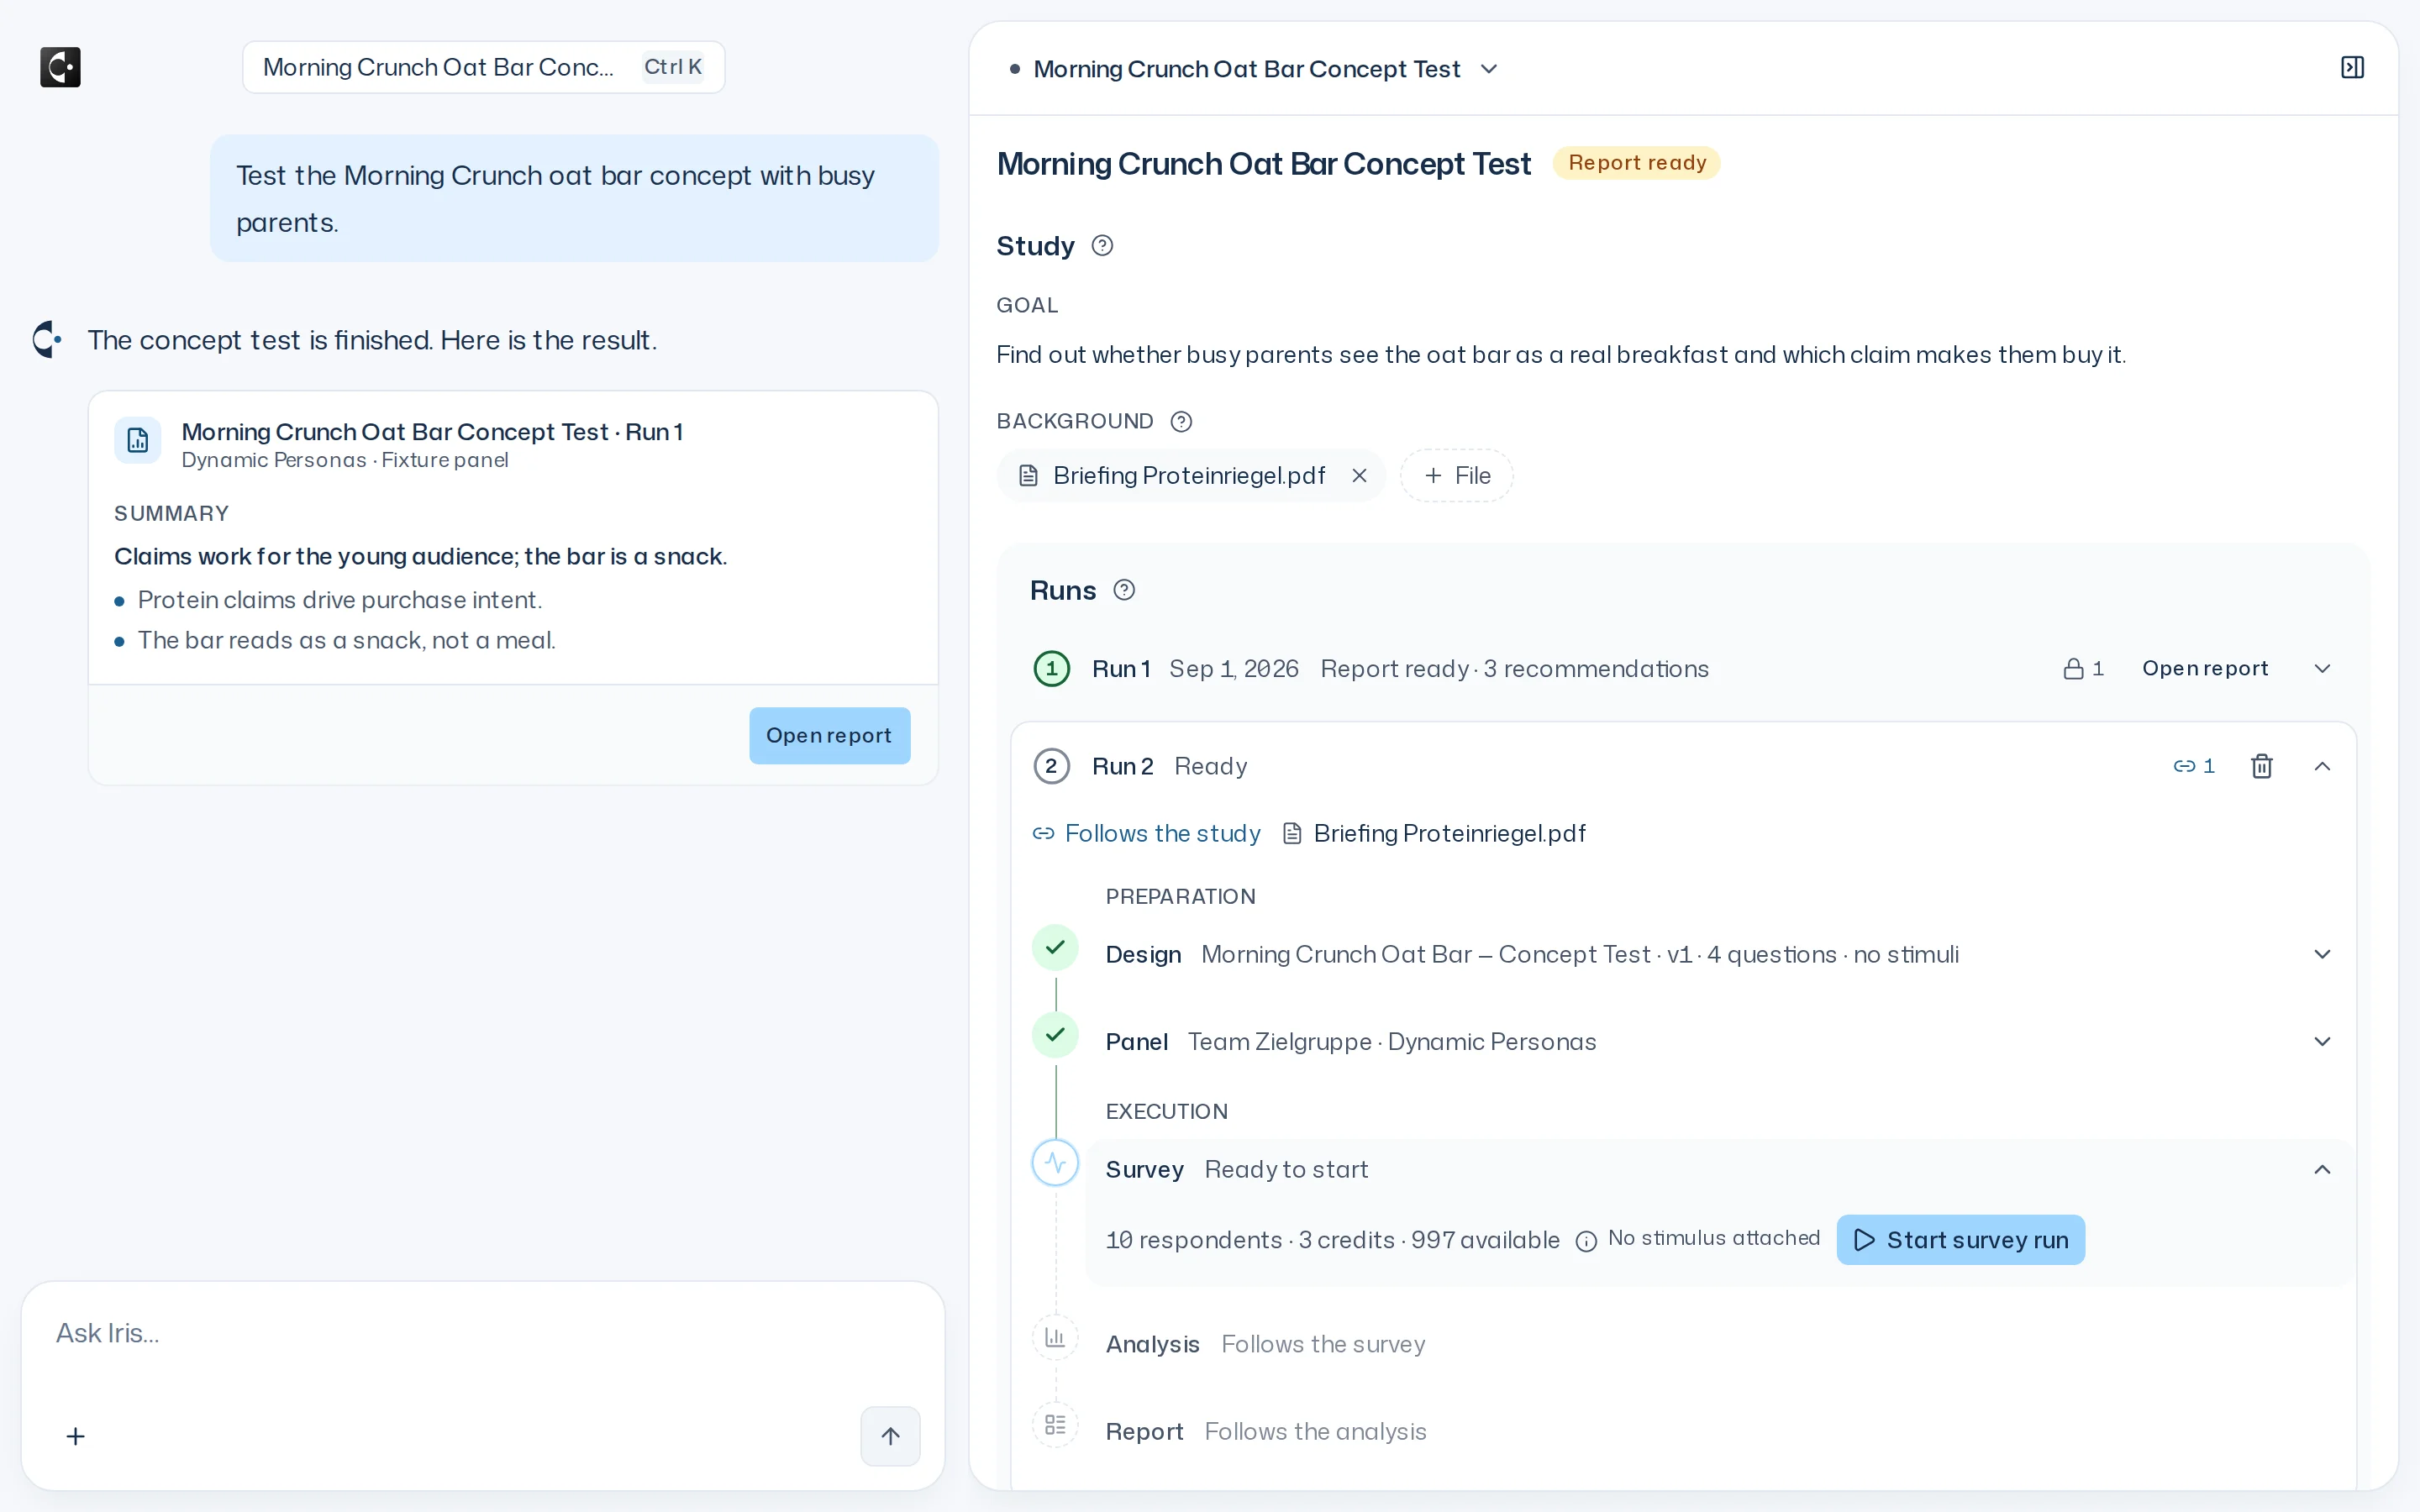
For question, study, Presentation, audience and file details, see Research details.
The queue
If you send a message with Send after while Iris is still working, it waits in the queue. The same goes for messages with a file or an object. It shows as Queued in the chat and runs as soon as Iris is done. That happens on the server, so you don't need to keep the chat open. Up to three messages can wait. When the queue is full, the chat says The queue is full. Wait until Iris has worked through a message.
- Remove takes a waiting message out again.
- Paused means the message won't run on its own, for example because your access was interrupted in the meantime. Continue sends it off.
Stopping a turn
You can stop Iris before the first answer appears. Stopped by you confirms the cancellation. Text already shown and completed tool results remain available. Surveys already started keep running; stop them separately.
Stopping returns ordinary queued messages to the draft. Send them again yourself if you still want Iris to handle them. Once the stop is complete, you can send a new message in the same chat without repeating the stopped turn.

When a turn fails
Occasionally Iris can't finish an answer. The chat then shows This turn failed. with three options:
- Retry repeats this turn. The conversation so far is kept.
- Skip drops the turn, and the next waiting message gets its turn.
- Clear queue discards all waiting messages. The app asks Clear the queue? first.
Until you decide, no further message runs in this chat.
When a chat gets too long
With every message, Iris reads the whole chat. If it has grown too long for that, Iris replies This Thread has grown too long to continue. Pick up the work in a new Thread. Below it the chat shows Context limit reached with a Continue in a new Thread button. It opens the home page for a new chat. The old chat stays, and you can still read it.
